These 7 Frugal Gardening Tips Will Help You Get Good Results For Less
- The 7 frugal gardening tips show you exactly how to close that gap, from building free compost to harvesting your own seeds, conserving water with zero-cost mulching, and using companion planting to replace chemical inputs.
- A 2025 survey by the National Gardening Association found that the average American household spends over $600 per year on gardening supplies, yet researchers at Wageningen University reported that gardeners using resource-efficient methods achieve yields equal to or greater than conventionally supplied plots at 40 to 60 percent lower input costs.
- As soil health awareness and water scarcity push gardeners toward smarter resource use, these methods are quickly shifting from fringe practice to mainstream standard.


Frugal gardening is the practice of achieving high plant productivity by substituting knowledge, timing, and biological inputs for purchased commercial products. It is not about neglect or doing less.
It is about doing the right things at the right time, using materials you already have or can obtain for free, and building systems that improve year over year without requiring new purchases. The seven tips below are sequenced so that each one builds on or complements the others, giving you a compounding return on effort.
Why Frugal Gardening Is Not Cutting Corners
Gardening costs have climbed steadily over the past three years. Fertilizer prices rose by more than 30% between 2022 and 2024 according to the USDA Economic Research Service, and potting media, transplants, and irrigation equipment have followed similar trends. For home gardeners, small-scale crop farmers, and community plot holders, this creates real pressure to either spend more or accept lower productivity. Neither option is acceptable.
Before diving into each tip, one principle applies across all of them: soil health is the foundation of low-cost gardening. Healthy soil feeds plants, retains water, suppresses disease, and reduces the need for every external input from fertilizer to pesticide. Investing time in your soil is always the highest-return activity in a frugal garden.
Tip 1: Build Your Own Compost & Stop Buying
Compost (decomposed organic matter that releases nutrients slowly and improves soil structure) is the single most powerful free input available to any gardener. The mechanism is straightforward: compost adds nitrogen, phosphorus, potassium, and dozens of micronutrients in slow-release form, and it feeds the soil microbial community that makes those nutrients available to plant roots.
How to Build a Working Compost System
You do not need a purchased bin. A simple three-sided enclosure made from four wooden pallets, or even a wire cylinder 90 cm in diameter, works just as well. The key is managing the carbon-to-nitrogen ratio, keeping the pile moist but not waterlogged, and turning it regularly to introduce oxygen.
- Brown materials (carbon-rich): Dry leaves, straw, cardboard, paper, wood chips. These slow the breakdown and prevent anaerobic (oxygen-free) conditions that cause foul odors.
- Green materials (nitrogen-rich): Kitchen vegetable scraps, fresh grass clippings, coffee grounds, plant trimmings. These provide the nitrogen that drives microbial activity and heat.
- Avoid adding: Meat, dairy, oily food, diseased plant material, or dog and cat waste. These attract pests or introduce pathogens that survive low-temperature composting.
- Ideal ratio: Roughly 3 parts brown to 1 part green by volume. This ratio sustains microbial activity without creating ammonia loss or a soggy pile.
A well-managed pile heats to 55 to 65 degrees Celsius at its core, which kills most weed seeds and pathogens. Turn it every 7 to 10 days, keep it as moist as a wrung-out sponge, and you will have finished compost in 6 to 10 weeks during warm months. Apply it at a rate of 5 to 7 cm per bed per season, worked into the top 15 cm of soil.

Tip 2: Save Your Own Seeds and Break Cycle
Commercial seed packets are convenient but expensive when purchased every season. Seed saving (collecting, drying, and storing seeds from your current crop for replanting the following season) breaks the annual purchase cycle and, over time, produces locally adapted varieties that perform better in your specific soil and climate than generic commercial stock.
Which Plants Are Easiest to Save Seeds From
Open-pollinated (OP) and heirloom varieties produce seeds that grow true to type, meaning the offspring closely resemble the parent plant. Hybrid varieties labeled F1 do not breed true and are not suitable for seed saving. Start with these crops, which are the most beginner-friendly:
a. Tomatoes: Allow one or two fruits to fully ripen past eating stage. Ferment the seeds in water for 2 to 3 days to remove the germination-inhibiting gel coat, rinse, dry on a paper plate, and store in a labeled envelope.
b. Beans and peas: Leave pods on the plant until they rattle when shaken. Shell, dry for two additional weeks indoors, and store in an airtight container.
c. Lettuce: Allow a few plants to bolt (send up a flower stalk). The seed heads dry on the plant. Shake them into a bag, separate the chaff by gentle blowing, and store.
d. Cucumbers and squash: Let one fruit per plant mature fully beyond eating stage. Scoop seeds, rinse away flesh, dry thoroughly for at least two weeks before storing.
e. Peppers: Scrape seeds from fully ripe fruits, dry flat on a paper towel for 10 to 14 days, and store in a cool dry location.
Properly dried and stored seeds retain germination rates of 70 to 90 percent for 2 to 5 years depending on species. Store them in sealed glass jars with a silica gel packet in a cool, dark location. A consistent storage temperature below 15 degrees Celsius doubles seed longevity.
Tip 3: Master Mulching to Cut Watering Time in Half
Mulch (any material laid on the soil surface around plants) does three things simultaneously: it reduces evaporation from the soil surface, suppresses weed germination, and moderates soil temperature.
A 2023 study published in HortScience measured evapotranspiration (the combined water loss from soil evaporation and plant transpiration) across mulched and unmulched vegetable beds and found that a 7 to 10 cm layer of organic mulch reduced soil moisture loss by 35 to 50% compared to bare soil during dry summer weeks. That translates directly into less time watering and lower water bills.
Free and Low-Cost Mulch Materials That Work
You do not need to buy bagged wood chips or decorative mulch. Effective mulch is available for free or near-free in most areas. Here are the best options ranked by availability and performance:
i. Straw (not hay): Straw is the dried stalks of cereal crops after grain harvest. It breaks down slowly, stays light and fluffy so rain penetrates easily, and contains very few weed seeds. A single bale from a farm supply store covers a large bed at low cost.
ii. Grass clippings: Apply in thin layers of 2 to 3 cm maximum. Thick layers of fresh clippings mat together, block air, and create a slimy barrier. Let them dry for a day before applying.
iii. Shredded leaves: Autumn leaves run through a lawn mower create excellent mulch. Whole leaves mat and shed water; shredded leaves do not. Collect and shred in autumn and store in bags for year-round use.
iv. Cardboard: A single layer of plain cardboard under other mulch creates a long-lasting weed barrier. Remove tape and staples, wet the cardboard before laying, and cover with 5 to 7 cm of another material.
v. Wood chips from arborists: Tree trimming companies often give wood chips away for free, since they pay to dispose of them. Fresh chips are excellent for pathways and around fruit trees but should not be incorporated into annual vegetable beds.
Apply mulch after soil has warmed in spring and remove or turn it in autumn to allow soil to freeze, which kills overwintering pests. Keep mulch 5 to 7 cm away from plant stems to prevent crown rot.
Tip 4: Use Companion Planting to Replace Pest Controls
Companion planting (the deliberate placement of different plant species near each other to achieve mutual benefits) reduces the need for pesticides, fungicides, and some fertilizers. It works through several distinct mechanisms: aromatic plants confuse or repel pest insects, flowering plants attract beneficial predators, and nitrogen-fixing legumes feed neighboring plants through root-zone bacterial activity.
Proven Companion Planting Combinations Worth Using
The Three Sisters system (corn, climbing beans, and squash planted together) is the most documented companion planting method in North American horticulture. Corn provides a trellis for beans, beans fix atmospheric nitrogen and make it available to corn and squash roots, and squash leaves shade the soil to suppress weeds and retain moisture.
Field trials at Cornell University’s Small Farms Program in 2024 showed that Three Sisters plots produced 15 to 20% more total caloric yield per square meter than monoculture plantings of the same crops, with no added fertilizer inputs. Other high-performing combinations include:
- Tomatoes with basil: Basil releases volatile compounds (aromatic chemicals from its leaves) that reduce feeding by thrips and aphids on neighboring tomato plants. Plant basil at 30 cm intervals between tomato plants.
- Carrots with onions: Onion scent deters carrot fly, and carrot scent deters onion fly. Alternate rows of each for mutual protection.
- Brassicas with nasturtiums: Nasturtiums act as a trap crop, meaning they attract aphids and cabbage white butterfly away from broccoli, cabbage, and kale. Check and remove infested nasturtium plants regularly.
- Legumes (beans, peas, clover) with heavy-feeding crops: Rhizobium bacteria in legume root nodules fix atmospheric nitrogen gas into plant-available ammonium. After the legume crop is finished, leave the roots in place and cut the top growth. The roots decompose and release nitrogen for the next crop.

Tip 5: Collect and Store Rainwater Before Runoff
Mains water for garden irrigation carries both a financial cost and, in many regions, a regulatory restriction during dry periods. Rainwater harvesting (capturing precipitation from roof surfaces and storing it for later irrigation use) addresses both problems. A standard 100 square meter roof surface captures approximately 90 liters of water per millimeter of rainfall. In areas with 600 mm of annual rainfall, a single roof can theoretically capture 54,000 liters per year, far more than most gardens need.
Setting Up a Low-Cost Rain Collection System
The simplest system requires only a downspout diverter, a 200 to 500 liter food-grade barrel or intermediate bulk container (IBC tank), and a basic tap fitting. Total material cost with salvaged or second-hand containers runs between $20 and $80 depending on location.
- Position your barrel: Place it on a stable raised platform 30 to 50 cm above ground level. Gravity pressure from this height is sufficient to fill watering cans and low-pressure drip lines without a pump.
- Install a first-flush diverter: This device discards the first 20 to 30 liters of each rain event, which carry the highest concentration of bird droppings, dust, and roof debris. Water quality improves significantly with this one addition.
- Cover the barrel: A tight-fitting lid prevents mosquito breeding and reduces algae growth from sunlight exposure.
- Connect multiple barrels in series: Once one barrel is full, overflow feeds the next. Three 200-liter barrels connected this way provide 600 liters of buffer for dry spells.
- Use collected water first: Empty stored rainwater before each rain event to maximize collection and ensure water does not sit for more than two weeks, which can cause bacterial growth.
Check local regulations before installing a collection system. Most US states and most countries allow household rainwater collection, but some jurisdictions in arid western US states historically restricted it. Many restrictions have been eased since 2020.
Tip 6: Start Plants From Cuttings Instead of Buying
Purchasing transplants from a garden center each spring is convenient but costly. Many commonly grown plants reproduce reliably from stem cuttings (a section of stem with at least one node, rooted in moist growing medium) or by division (splitting an established clump into multiple plants). These propagation methods are free once you have the parent plant and require only basic materials.
Plants That Root From Cuttings
Vegetative propagation (reproducing plants from non-seed plant tissue) works because most plant cells retain the genetic programming to form roots and shoots when given the right conditions. Auxins (plant hormones that trigger root formation) concentrate naturally at cut surfaces within 24 to 72 hours of taking a cutting. You can accelerate this with a small amount of rooting hormone powder, but many herbs and shrubs root readily without any treatment.
1. Herbs: Mint, rosemary, thyme, sage, basil, and oregano all root from 10 to 15 cm stem cuttings placed in water or moist perlite within 10 to 21 days. One parent plant can produce 10 to 20 new plants per season at zero cost.
2. Soft fruit: Blackcurrants, gooseberries, and hardwood cuttings of fig and mulberry taken in autumn have rooting rates of 70 to 90 percent with no special treatment beyond a moist growing medium.
3. Perennial vegetables: Artichoke, asparagus, rhubarb, and horseradish are all divided from established crowns. One mature rhubarb crown, for example, can be divided into 4 to 6 new crowns every 3 to 4 years.
4. Flowers: Dahlias, chrysanthemums, pelargoniums, and many groundcovers root freely from cuttings taken in late summer, overwintered indoors, and replanted in spring.

Take cuttings in the morning when plant tissue is fully hydrated. Use a clean, sharp blade to make a cut just below a node. Remove lower leaves to prevent rotting in contact with the growing medium. Keep cuttings in indirect light and maintain consistent moisture until roots are established, which you can confirm by gentle resistance when tugging the cutting after two to three weeks.
A single healthy parent plant, properly propagated, can supply an entire neighborhood with starts. The knowledge to do it is the only scarce resource.
Tip 7: Feed Your Soil With Homemade Liquid Fertilizers
Liquid fertilizers deliver nutrients directly to the root zone in plant-available form, producing fast growth responses that solid amendments cannot match for speed. Commercial liquid fertilizers work well but cost significantly more per application than homemade equivalents made from materials already in your garden or kitchen. Two of the most effective homemade liquid fertilizers are compost tea and weed tea, both of which produce measurable nutrient delivery at effectively zero cost.
Compost Tea
Compost tea (water infused with compost and aerated to multiply beneficial microorganisms) is produced by suspending a bag of mature compost in water and bubbling air through it for 24 to 48 hours using an aquarium pump. The process multiplies aerobic bacteria and fungi by factors of 10 to 100, producing a liquid that delivers both nutrients and a population of beneficial microbes to the root zone. Apply it immediately after brewing; microbial populations decline rapidly once aeration stops.
Use 1 liter of finished compost per 10 liters of water. Aerate continuously for 24 to 48 hours at room temperature. Dilute the finished tea 1:10 with water before applying to avoid burning and to stretch the yield. Water directly at the root zone for nutrient delivery, or apply as a foliar spray early in the morning for disease suppression benefits.
Weed Tea
Weed tea (also called liquid nettle fertilizer or plant-based liquid feed) extracts nutrients from pulled weeds through water-based decomposition. Fill a bucket two-thirds full with pulled weeds, ideally nettles, comfrey, or dandelions, which are particularly high in nitrogen, potassium, and calcium.
Cover with water, weigh down the plant material with a stone, and cover the bucket loosely. After 3 to 4 weeks, the liquid will be dark and strong-smelling. Strain out solids and dilute the liquid 1:20 with water before applying. Undiluted weed tea is too concentrated and will burn roots.
Comfrey leaves in particular contain potassium levels competitive with commercial tomato feeds. A 2023 study in the journal Scientia Horticulturae measured the nutrient content of homemade comfrey liquid and found potassium concentrations of 1.2 to 1.8 grams per liter, comparable to many commercial liquid tomato fertilizers sold at significant cost per liter.
All 7 Frugal Gardening Tips Together in Seasonal Plan
Each of these tips works independently, but the real gains come from using them as a system. Here is how a seasonal workflow might look for a gardener applying all seven together:
- Late winter: Brew compost tea and apply to beds two weeks before planting to reactivate soil biology after winter dormancy.
- Early spring: Start seedlings indoors. Take cuttings from overwintered herbs and fruit bushes. Set up or check rain barrels before spring rains begin.
- Spring planting: Apply 5 cm of finished compost to all beds. Lay cardboard and wood chip mulch on pathways. Lay straw mulch around transplants once soil has warmed.
- Through the growing season: Apply weed tea or compost tea every 2 to 3 weeks to heavy feeders. Top up mulch as it breaks down. Let companion plants fill in gaps between crops.
- Late summer: Begin seed saving from your best-performing plants. Take late summer cuttings of perennials and shrubs for overwintering.
- Autumn: Collect and shred leaves for mulch storage. Start a fresh compost pile with spent crops and leaf material. Add the previous pile’s finished compost to beds.
- Winter: Dry and store saved seeds. Clean and store equipment. Plan next year’s companion planting layout to rotate crops and maintain companion benefits.
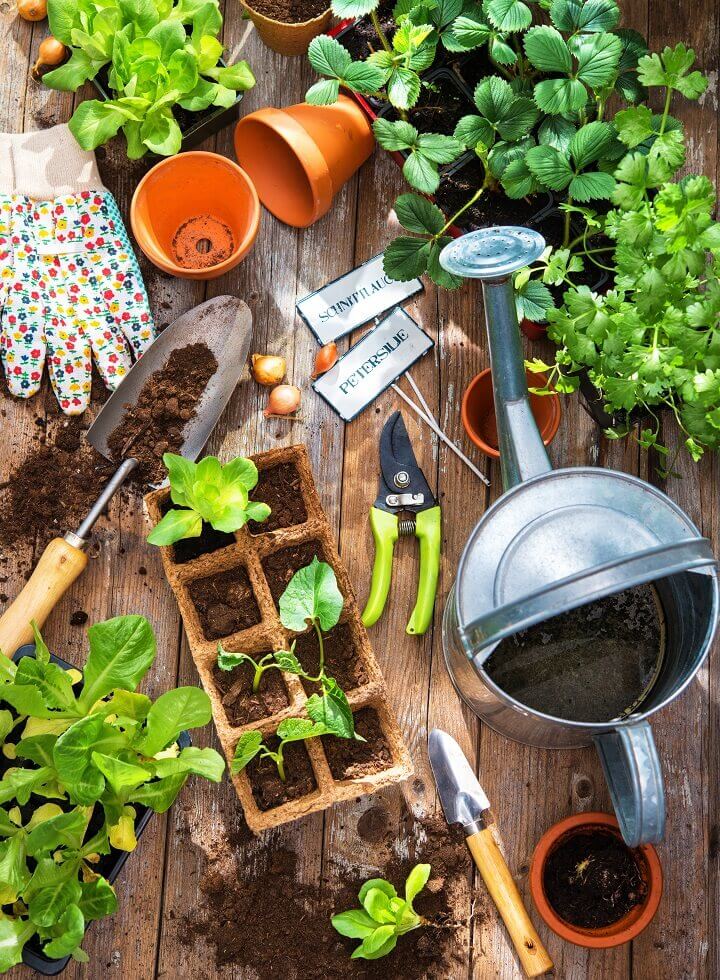
Frugal gardening tips become most powerful when they build on each other. The compost you make feeds the weed tea you brew. The mulch you apply reduces the water you need to harvest from rain barrels. The seeds you save carry the genetic selection of plants that already thrived in your specific conditions. The system becomes self-reinforcing over time, meaning the investment of knowledge and effort compounds while the financial cost trends toward near-zero.
Long-Term Case for Spending Less & Growing More
Cost-effective gardening is not a sacrifice. The evidence from both controlled trials and practical field experience shows that low-input, knowledge-intensive gardens consistently match or outperform high-input systems when soil health is prioritized.
A 2025 analysis by the Rodale Institute tracking 40 years of organic versus conventional systems found that long-term organic plots, which largely parallel frugal gardening methods in their avoidance of synthetic inputs, matched conventional yields in most crops while reducing production costs by an average of
35 to 40% over the full trial period. These 7 frugal gardening tips are not a temporary workaround for high prices. They represent a permanent shift toward resilient, productive growing that improves with each passing season.Start with whichever tip fits your immediate situation, whether that is building a compost pile this week, setting up a rain barrel before the next weather system arrives, or simply saving seeds from your best tomato plant at the end of this growing season. Each step reduces dependency on purchased inputs and builds a garden that is more productive, more resilient, and genuinely less expensive to run.
Conclusion
Frugal gardening is ultimately a mindset shift before it is a set of techniques. Once you start seeing pulled weeds as free liquid fertilizer, fallen leaves as next season’s mulch, and your best tomato as a seed bank rather than just a meal, the garden stops being a money sink and starts functioning as a self-sustaining system.
These 7 frugal gardening tips work because they align with how plants and soil naturally operate, not against it. The garden rewards patience and observation more than any other input. Pay attention to what your soil, plants, and local climate are telling you, apply these frugal gardening tips consistently, and the results will follow.
Frequently Asked Questions (FAQs)
How long does it take for a compost pile to become ready to use?
A well-managed compost pile with regular turning, the right moisture level, and a balanced mix of green and brown materials reaches usable maturity in 6 to 10 weeks during warm summer months. In cooler conditions, expect 3 to 6 months. Finished compost smells earthy, not sour or ammonia-like, and the original materials are no longer recognizable. If you need compost faster, chop or shred inputs into smaller pieces before adding them, since surface area drives microbial breakdown speed.
Can I save seeds from supermarket vegetables and fruits?
Sometimes, but with important limitations. Many supermarket vegetables come from F1 hybrid varieties, which do not produce offspring true to the parent. Tomatoes, peppers, and squash purchased from specialty or farmers market sources are more likely to be open-pollinated varieties worth saving. Supermarket herbs like basil, coriander, and dill are generally open-pollinated and seed reliably. When in doubt, let one plant bolt and flower, observe whether it sets viable seed, and test germination before committing a full bed to saved seed.
Is rainwater safe to use on edible crops?
Rainwater collected from clean metal or tile roofs is generally safe for vegetable irrigation when applied at the root zone rather than directly on edible leaf surfaces. Avoid collecting water from roofs with lead flashing, treated wood, or asphalt shingles if you intend to use it on edibles, since these materials can leach compounds into runoff. A first-flush diverter, which discards the first 20 to 30 liters of each rain event, removes the majority of surface contaminants and significantly improves water quality for garden use.
What is the cheapest way to improve very poor or compacted soil?
The most cost-effective approach for compacted or nutrient-poor soil is a combination of deep-rooted cover crops and surface compost application. Daikon radish, tillage radish, and deep-rooted clovers physically break compaction through root action and die back over winter, leaving organic channels that improve drainage and aeration. Combined with 5 to 7 cm of surface compost each season, this approach transforms even degraded soil within 2 to 3 growing seasons without any mechanical tillage or purchased soil amendments.
Do companion planting benefits actually hold up in real garden conditions?
Yes, but results vary by plant combination and growing context. The best-documented benefits are nitrogen fixation by legumes (which is mechanistically proven and consistently quantified in peer-reviewed literature), and trap cropping, where a sacrificial plant draws pests away from the main crop. Aromatic pest repulsion effects from plants like basil and marigolds are real but more modest and context-dependent. The safest approach is to test one or two companion combinations each season, observe the results in your specific garden, and add those that demonstrably reduce pest pressure or improve yield.
How do I know if my homemade liquid fertilizer is too concentrated?
The clearest signs of over-concentration are leaf tip burn (browning at the edges or tips of leaves within 24 to 48 hours of application), wilting despite adequate soil moisture, and yellowing of younger leaves. If you see any of these after applying weed tea or compost tea, flush the soil with plain water immediately and dilute your next batch more aggressively. As a general rule, your liquid fertilizer should be the color of weak tea, not dark coffee. When uncertain, err toward greater dilution. A slightly dilute feed applied consistently delivers better results than a concentrated application that stresses plant roots.
Can I use wood ash from my fireplace as a free garden fertilizer?
Wood ash is a legitimate and often overlooked free soil amendment. It contains potassium, calcium, and trace minerals, and it raises soil pH, making it useful on acidic soils. Apply it sparingly at no more than 100 to 150 grams per square meter per year. Avoid using it around acid-loving plants like blueberries, azaleas, and potatoes. Do not apply it at the same time as nitrogen fertilizers, since the alkaline ash reacts with nitrogen compounds and causes ammonia loss. Test your soil pH before using wood ash regularly, as raising pH too far reduces the availability of several nutrients even when they are present in the soil.
References:
1. Ceccarini, C., Delnevo, G., & Prandi, C. (2020, September). Frugar: Exploiting deep learning and crowdsourcing for frugal gardening. In Proceedings of the 1st Workshop on Experiences with the Design and Implementation of Frugal Smart Objects (pp. 7-11).
2. Pansera, M., & Sarkar, S. (2016). Crafting sustainable development solutions: Frugal innovations of grassroots entrepreneurs. Sustainability, 8(1), 51.
3. Gilbert, N. (2016). Frugal farming. Nature, 533(7603), 308-310.
4. Farrell, C. (2011). The new frugality: How to consume less, save more, and live better. Bloomsbury Publishing USA.
5. Rao, B. C. (2013). How disruptive is frugal?. Technology in society, 35(1), 65-73.
6. Forge, A. (2011). Frugavore: How to Grow Organic, Buy Local, Waste Nothing, and Eat Well. Skyhorse Publishing Inc..
7. Martinez, J. M., Bresin, S., & Shelnutt, K. P. (2020). Raising Healthy Children: Frugal Shopping Tips for Families: FCS8924/FY1194, rev. 12/2020. EDIS, 2020(6).
8. Rishi, P. (2022). Frugality and innovation for sustainability. In Managing climate change and sustainability through behavioural transformation (pp. 79-104). Singapore: Springer Singapore.
9. Bhaduri, S., Sinha, K. M., & Knorringa, P. (2018). Frugality and cross-sectoral policymaking for food security. NJAS-Wageningen Journal of Life Sciences, 84, 72-79.
10. Roiland, D. (2016). Frugality, a positive principle to promote sustainable development. Journal of Agricultural and Environmental Ethics, 29(4), 571-585.