In Just 20 Easy Steps, Learn How To Lay Sod
- The U.S. lawn and garden market reached $62.5 billion in 2024, and sod installation accounts for a significant and growing share as homeowners, farmers, and land managers demand faster turf establishment than seeding allows (Statista, 2024).
- Knowing how to lay sod correctly is the difference between a lawn that roots within three weeks and one that dies within three days.
- Every step is grounded in turfgrass science so that whether you are a home gardener, an agronomist managing a sports field, or a crop farmer adding a green buffer zone, you execute this process with confidence.


Growing a lush, green, and healthy lawn is easy when you lay sod. Growing grass from seed has its advantages but expediency is not one of them. It can take years for the grass to fully root and spread.
Why Sod Beats Seeding And When
Sod and seed accomplish the same end goal: a healthy, established turf cover. Sod is essentially living carpet — pre-grown turf that has been harvested with its root zone intact and delivered to your site ready to be placed directly on prepared soil.
Seeding, by contrast, requires germination time ranging from 7 to 30 days depending on species, followed by weeks of fragile establishment before the turf can tolerate any foot traffic or stress. The practical advantages of sod are well established in turfgrass science:
a. Immediate erosion control. Sod holds soil from the moment it is placed, making it the preferred choice on sloped terrain, riverbanks, and construction sites where bare soil is vulnerable to rain-driven displacement.
b. Faster usability. A properly installed sod lawn is ready for moderate foot traffic within 2 to 3 weeks. A seeded lawn requires 8 to 12 weeks before it reaches equivalent tolerance.
Weed suppression from day one. Sod’s dense canopy denies weed seeds light and physical space, reducing early-establishment weed pressure significantly compared to seeded areas.
c. Year-round installation window. While seeding has narrow optimal windows tied to germination temperature, sod can be installed in spring, summer, or early fall as long as heat extremes are avoided and irrigation is available.
What You Need Before You Start
Good preparation determines whether your installation succeeds or struggles. Before you purchase a single pallet of sod, gather your tools and make an informed species selection.
Essential Tools for a Successful Sod Installation
i. Soil pH and nutrient test kit or lab submission form. You cannot amend soil correctly without knowing its baseline chemistry. A professional lab test costs between $15 and $40 and is worth every cent.
ii. Tiller or rototiller (a motorized machine that breaks and loosens compacted soil). Rent one if you do not own it — hand digging is insufficient for areas larger than 20 square meters.
iii. Landscaping rake and grading rake. These tools serve different purposes: the landscaping rake moves soil in bulk; the grading rake achieves final fine leveling.
iv. Lawn roller (a heavy cylinder filled with water that firms the sod against the soil surface after installation). Most equipment rental stores carry these.
v. Sod knife or sharp utility knife. You will cut sod to fit curved beds, edges, and obstacles dozens of times during installation.
vi. Wheelbarrow and garden hose with adjustable nozzle. Both are non-negotiable for efficient movement and precise watering control.
Choosing the Right Grass Species
Turfgrass species selection (choosing the specific type of grass plant that will form your lawn) is among the most consequential decisions in the entire process. The wrong species in the wrong climate will never perform at its potential regardless of how well you install it.
1. Cool-season grasses — Kentucky bluegrass (Poa pratensis), tall fescue (Festuca arundinacea), and perennial ryegrass (Lolium perenne) — grow most actively in soil temperatures between 10°C and 18°C. They suit regions with cold winters and mild summers.
2. Warm-season grasses — bermudagrass (Cynodon dactylon), zoysiagrass (Zoysia spp.), and St. Augustinegrass (Stenotaphrum secundatum) — thrive in soil temperatures above 21°C and dominate in subtropical and tropical climates.
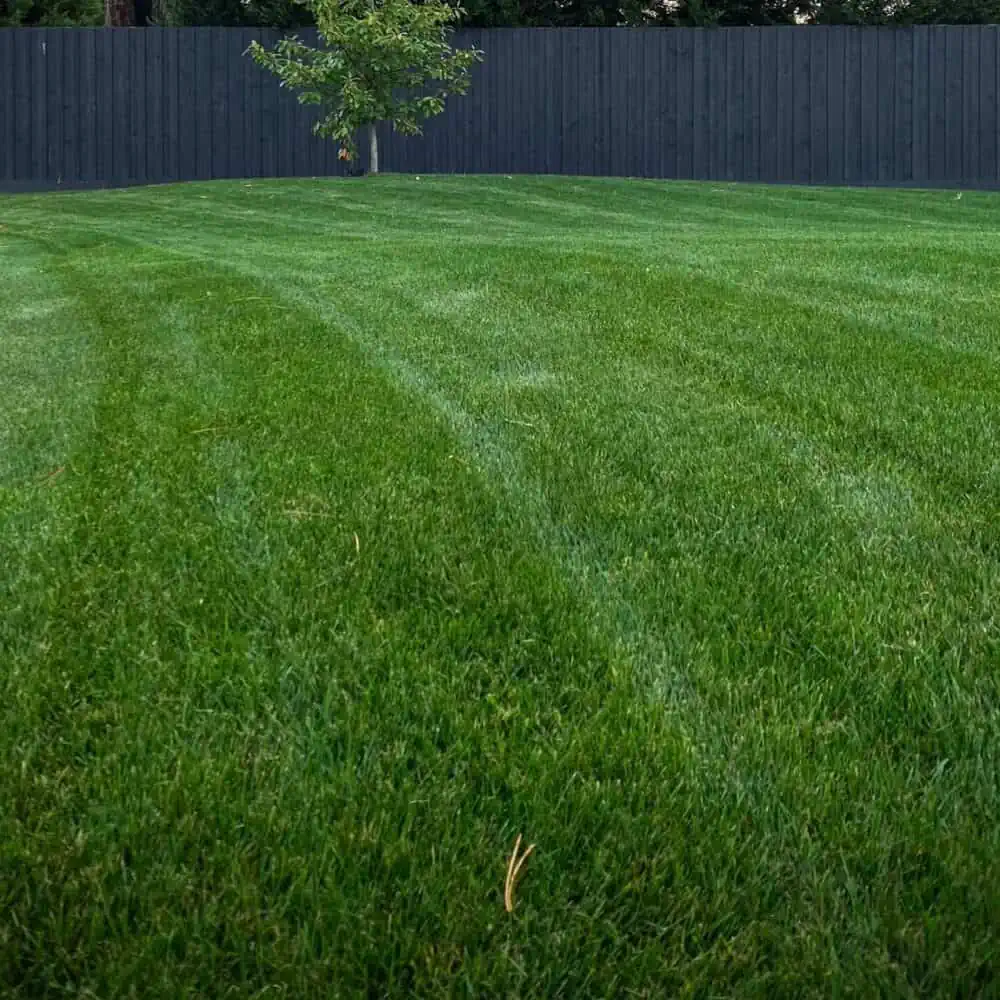
20 Easy Steps For Lay Sod
Soil preparation is where most failed sod installations begin. Skipping or rushing these steps creates an invisible barrier between the sod’s root system and the native soil below, preventing the rooting that holds everything together.
- Test your soil pH and nutrient levels
- Clear existing vegetation
- Till the soil to the correct depth
- Grade the surface for drainage
- Amend the soil based on test results
- Apply a starter fertilizer
- Rake and firm the seedbed
- Order and schedule sod delivery
- Start along a straight edge
- Stagger the seams like brickwork
- Cut curves and edges cleanly
- Press sod firmly against the soil
- Fill gaps with soil or sod plugs
- Roll the entire surface
- Water immediately and deeply
- Follow the establishment watering schedule
- Keep foot traffic off for 2–3 weeks
- Mow for the first time at the right height
- Apply post-establishment fertilizer
- Monitor for pests, disease, and dry patches
Step 1: Test Your Soil pH and Nutrient Levels
Collect soil samples from five to eight locations across your installation area at a depth of 10 to 15 cm. Mix them together and submit the composite sample to your local agricultural extension lab or a certified private lab. The test results will report soil pH, available nitrogen (N), phosphorus (P), potassium (K), and often organic matter percentage.
Most turfgrasses perform best at a soil pH between 6.0 and 7.0. Outside this range, nutrient availability collapses regardless of how much fertilizer you apply — a process called nutrient lockout (when soil pH causes essential minerals to bind to soil particles and become chemically unavailable to plant roots).
Step 2: Clear Existing Vegetation
Remove all existing grass, weeds, and organic debris from the installation area. You have two reliable methods: physical removal using a sod cutter (a machine that slices existing turf into strips for disposal), or chemical removal using a non-selective herbicide such as glyphosate.
If you use glyphosate, follow all label instructions and allow a minimum of 7 to 14 days before tilling, as residual activity must dissipate before introducing new plant material.
Do not simply till existing vegetation under. Buried organic matter decomposes unevenly, creating soft spots and grade inconsistencies that you will feel beneath your feet for years.
Step 3: Till the Soil to the Correct Depth
Till the entire area to a depth of 10 to 15 cm (4 to 6 inches). This breaks soil compaction (the compression of soil particles into dense layers that block root penetration and water infiltration). A single pass with a tiller is rarely sufficient on heavily compacted soils — make two passes at perpendicular angles for thorough results. Tilling also incorporates any surface amendments you will add in Step 5, blending them homogeneously into the root zone rather than leaving them as a discrete surface layer.
Step 4: Grade the Surface for Proper Drainage
Grading (reshaping the soil surface to control where water flows) prevents standing water, which is one of the fastest ways to kill newly installed sod through root oxygen deprivation and fungal disease.
The standard recommendation from the Irrigation Association (2023) is a minimum slope of 1 to 2% away from all structures — that is a 1 to 2 cm drop for every 1 meter of horizontal distance.
Use a landscaping rake to pull high spots down into low areas. Check your grade visually by observing the surface from multiple angles at eye level. For precision on large areas, a laser level or a long straightedge and spirit level will confirm uniformity.

Step 5: Amend the Soil Based on Test Results
Your soil test report will specify exact amendment rates. Follow them precisely. Common amendments include:
i. Agricultural limestone (ground calcium carbonate used to raise soil pH in acidic soils). Incorporate at the rate specified by your test, typically 50 to 150 kg per 100 square meters depending on starting pH and soil texture.
ii. Elemental sulfur (used to lower pH in alkaline soils). Work in at rates of 1 to 3 kg per 10 square meters, understanding that sulfur’s effect develops over several months as soil bacteria convert it to sulfuric acid.
iii. Compost or aged organic matter (decomposed plant and animal material that improves soil structure, water retention, and microbial activity). Incorporate a 5 to 7 cm layer into sandy or clay-heavy soils to improve rooting conditions.
Step 6: Apply a Starter Fertilizer
Starter fertilizer (a granular fertilizer formulated with higher phosphorus content to fuel root development in newly planted turf) should be applied immediately before final raking. Look for a formulation with an N-P-K (nitrogen-phosphorus-potassium) ratio such as 10-20-10 or 12-24-12.
Apply at the rate listed on the product label and rake it into the top 2 to 3 cm of soil.
Phosphorus is the critical nutrient here. It drives cell division in root meristems (the growing tips of roots where new cells are produced), accelerating the development of the dense root mat that anchors sod to native soil.
Step 7: Rake and Firm the Seedbed
Rake the amended soil to a smooth, fine-textured surface. Your goal is a seedbed free of clods larger than 2 cm, free of depressions, and uniformly firm. Walk the entire area after raking — your foot should leave only a shallow impression of 5 to 10 mm. If your foot sinks deeply, the soil is too loose and will allow sod to shift and gap after installation.
A light pass with the lawn roller (half-filled with water) after final raking is the professional standard for achieving the right firmness before laying begins.
Steps 8: Order and Schedule Your Sod Delivery
With preparation complete, you move into the installation phase. Work methodically. Speed without precision creates problems that are expensive to fix after the fact.
Order sod to arrive on the same day you plan to install it. Sod is a perishable product. Harvested sod begins to heat internally through microbial respiration within hours of cutting, and pallets left stacked in the sun degrade rapidly. The American Sod Producers Association recommends installation within 24 hours of harvest as the standard to maintain root viability.
When ordering, calculate your area in square meters and add 5 to 10% for cuts, irregular edges, and waste. Specify the grass species, harvest date, and request pallets that have been watered within 24 hours of delivery.
Step 9: Start Laying Along a Straight Edge
Begin your first row along the longest straight edge of your installation area — a sidewalk, driveway, or fence line works perfectly. This first row is your reference line; every subsequent row aligns to it.
Lay sod rolls end to end without stretching or compressing them, pressing each piece firmly against its neighbor with zero visible gap.”The first row is the spine of your sod installation. If it is straight, level, and firmly seated, every row that follows it will be easier and more accurate.”
Step 10: Stagger the Seams Like Brickwork
Stagger each successive row so that the joints between pieces never line up vertically with the joints in the adjacent row. This brick-bond pattern (the same offset arrangement used in brick walls) prevents long, continuous seams from forming channels where the sod edges can dry out and separate.
Offset each row by at least half a sod piece length. On rectangular areas this is straightforward. On irregular-shaped areas, start each row with a half-piece cut to maintain the pattern.
Step 11: Cut Curves and Edges Cleanly
Use your sod knife to fit pieces around curves, trees, garden beds, and other obstacles. Score the piece on the grass side for straight cuts, and score the soil side for curve cuts. A sharp blade makes clean cuts that butt tightly against edges; a dull blade tears and compresses the sod, creating ragged margins that dry out.
For curved bed edges, lay the sod slightly over the edge and then cut the final profile in place using the bed edge as your guide. This produces a cleaner, more precise fit than trying to pre-cut pieces and then align them.
Step 12: Press Sod Firmly Against the Soil
Every piece of sod must make full, uniform contact with the soil beneath it. Air pockets between the sod mat and the soil surface dry out roots within hours in warm weather. As you lay each piece, kneel on a short plank placed on previously laid sod and press down firmly along the full length of the seam with your hands.
Do not stand directly on freshly laid sod without a board beneath you — the soil is loose enough that concentrated foot pressure creates depressions.
Step 13: Fill Any Gaps with Topdressing
Despite best efforts, small gaps will appear at seams and corners. Fill these immediately with a topdressing mixture (a blend of fine soil or sand matched to your soil type) rather than leaving them open. Exposed sod edges at gaps dehydrate and die rapidly, pulling adjacent sections into failure through edge-desiccation stress. Work the topdressing into gaps with a stiff brush or your gloved hand, bringing the fill level with the surrounding sod surface.
Step 14: Roll the Entire Installed Area
After all sod is placed and gaps are filled, make a single pass with your half-filled lawn roller across the entire area in two perpendicular directions. Rolling presses the sod root zone firmly against the prepared soil below, eliminating air pockets that raking and hand-pressing missed.
Do not over-roll. One pass in each direction is sufficient. Excessive rolling on wet soil compacts the soil surface, which works against the aeration and water infiltration you worked to achieve in preparation.

Installation is complete, but establishment is not. The next four to six weeks are when the sod’s root system penetrates the native soil and anchors permanently. Every care decision during this window has an outsized impact on long-term success.
Step 15: Water Immediately and Deeply
Water the entire installation within 30 minutes of completing the final row. The goal of this first watering is to saturate both the sod mat and the top 10 cm of native soil below it. Lift a corner of sod after watering if the native soil feels moist 5 to 8 cm deep, you have watered correctly. If it is dry, continue watering.
Irrigation depth (how far water penetrates into the soil profile) matters enormously here. Shallow watering keeps roots near the surface; deep watering pulls roots downward as they follow moisture, building the deep root architecture that makes an established lawn drought-tolerant.
Step 16: Follow a Disciplined Watering Schedule
The first two weeks after installation are the most water-intensive period. The sod has no established root connection to the native soil and cannot access moisture stored below the interface layer. Follow this schedule during establishment:
a. Days 1 to 7: Water two to three times daily, keeping the sod and the top 3 to 5 cm of native soil continuously moist. Early morning and late afternoon waterings are most efficient, reducing evaporation loss.
b. Days 8 to 14: Reduce to once daily, watering deeply enough to moisten native soil to 7 to 10 cm depth. Lift sod corners every two to three days to verify that roots are beginning to penetrate native soil.
c. Days 15 to 21: Water every other day, pushing moisture deeper to encourage continued downward root growth.
d. Days 22 onward: Transition to a mature lawn irrigation schedule based on evapotranspiration (the combined water loss from soil evaporation and plant transpiration), typically 2.5 to 3.5 cm of water per week delivered in two deep applications.
Step 17: Keep Foot Traffic Off for 2 to 3 Weeks
New sod roots are fragile and anchor-less during the first two weeks. Any traffic — including pets, children, and lawn equipment — shears newly formed root hairs from the native soil surface before they achieve tensile grip. Post clear signage if your installation is in a shared space. In professional sod projects, temporary fencing is standard practice.
The field test for traffic readiness is simple: grasp the sod at one corner and tug upward. If the sod lifts easily without resistance, it has not yet rooted. If it resists your pull and requires force to detach, rooting has begun and light traffic is acceptable.
Step 18: Perform the First Mow at the Right Height
The first mowing after sod installation is one of the most mishandled steps. Most homeowners mow too low, too soon. Wait until the sod has passed the tug test (Step 17) and until the grass has grown to a height 30 to 50% above its recommended maintenance height before mowing for the first time.
For most cool-season grasses, the target maintenance height is 6 to 8 cm. First mowing should occur at 9 to 12 cm of growth, removing no more than one-third of the leaf blade per mowing session. This one-third rule (never removing more than 33% of leaf blade height in a single cut) prevents photosynthetic stress that would redirect the plant’s energy away from root development.
Use a sharp mower blade. A dull blade tears grass tissue rather than cutting it cleanly, creating ragged leaf ends that lose water rapidly and serve as entry points for fungal pathogens.
Step 19: Apply Post-Establishment Fertilizer
Four to six weeks after installation, when the sod has fully rooted and tolerated its first two mowings, apply a balanced slow-release fertilizer (a granular product that delivers nitrogen, phosphorus, and potassium gradually over 8 to 12 weeks rather than all at once). A 28-5-12 or similar formulation suits most established turfgrass.
Avoid applying nitrogen-heavy fertilizers before full rooting. Excess nitrogen pushes rapid top growth, which demands more water and photosynthate than the shallow root system can support in the early establishment period.
The USDA Natural Resources Conservation Service (NRCS, 2024) recommends withholding high-nitrogen applications for a minimum of four weeks post-installation across all turfgrass establishment projects.
Step 20: Monitor for Pests, Disease, and Dry Patches
Conduct a visual inspection of your sod installation every three to four days during the first six weeks. Look for:
- Brown patches with defined circular margins — a signature of dollar spot (Sclerotinia homoeocarpa) or brown patch (Rhizoctonia solani) fungal diseases, both of which thrive in humid conditions and can spread rapidly through newly established sod.
- Dry, tan, or curling sod edges at seams — a sign of inadequate irrigation, gaps in the topdressing, or sod pieces that were not pressed firmly enough against the soil.
- Yellowing or pale green coloration across the entire area — typically indicates nitrogen deficiency, iron deficiency (common in alkaline soils), or waterlogging from over-irrigation.
- Irregular tunneling or lifted sod sections — evidence of subsurface pest activity, most commonly grubs (larvae of scarab beetles) that feed on the sod’s root zone from below.
- Address problems early. A single diseased patch caught at 30 cm across is manageable; the same disease left for two weeks can cover 10 square meters.
Common Mistakes That Kill Sod
Understanding failure modes is as important as understanding best practices. The most common reasons sod installations fail are well documented in turfgrass extension literature and share a predictable pattern.
Skipping the soil test is the single most frequent error. Without pH data, amateur installers apply lime or sulfur based on guesswork, often making soil chemistry worse rather than better.
Laying sod on dry soil is the second most common failure. Sod laid on dry native soil draws moisture from the sod mat to the soil below through capillary action (the movement of water through small spaces driven by adhesion and cohesion forces between water molecules and soil particles), desiccating the root zone within hours. Always water native soil to field capacity immediately before laying.
Ignoring the one-third mowing rule during the first post-installation mow is responsible for a significant portion of avoidable sod setbacks. Scalping new sod strips the photosynthetic capacity the plant needs to fund ongoing root growth.
Choosing the wrong species for the local climate condemns the installation before the first piece is laid. A cool-season grass planted into subtropical heat, or a warm-season grass expected to survive sustained freezing temperatures, will never perform as intended regardless of installation technique.
Over-watering in the second and third week is an equally damaging error on the opposite end of the spectrum. Continuously saturated soil drives out oxygen from the root zone, creating anaerobic conditions (a low- or no-oxygen environment) that kill roots and promote the activity of water mold pathogens like Pythium spp. The correct approach is deep, infrequent irrigation that allows the top 2 to 3 cm of soil to partially dry between cycles by week two.
Conclusion
Learning how to lay sod well is not about brute labor — it is about executing each of these 20 steps with precision and understanding the biology behind every decision. Soil pH drives nutrient availability. Grading prevents anaerobic stress. Staggered seams prevent desiccation channels. The one-third mowing rule protects photosynthetic capacity during the critical rooting window. Each step feeds into the next.
The total process, from soil test to first post-establishment fertilizer application, spans roughly six weeks. The payoff is a dense, rooted turf that manages erosion, reduces urban heat, supports biodiversity, and delivers usable green space in a fraction of the time seeding requires.
Frequently Asked Questions (FAQs)
How long does it take for sod to root into the soil?
Most sod varieties establish initial root contact within 10 to 14 days under proper watering. Full, deep rooting that anchors the turf securely takes 4 to 6 weeks. You can test readiness by grabbing a corner and tugging — resistance means roots have taken hold.
Can I lay sod on top of existing grass?
No. Laying sod over existing vegetation creates a decomposing layer between the new roots and native soil, blocking root penetration entirely. Always clear and till the existing surface before installation.
What is the best time of year to lay sod?
Cool-season grasses establish best in early spring or early fall when soil temperatures sit between 10°C and 18°C. Warm-season grasses prefer late spring through early summer when soil exceeds 21°C. Avoid installation during peak summer heat or hard frost periods.
How much does it cost to sod a lawn?
Sod typically costs $0.35 to $0.85 per square foot for materials alone. Professional installation adds $1.00 to $2.00 per square foot in labor. A 2,000 square foot lawn runs between $2,700 and $5,700 fully installed depending on grass species and site conditions.
How often should I water new sod in the first week?
Water two to three times daily during days 1 through 7, keeping both the sod mat and the top 5 cm of native soil continuously moist. Early morning and late afternoon are the most efficient watering times, as midday heat accelerates evaporation significantly.
Can I lay sod in the rain?
Light rain is fine and actually helps with establishment. Heavy rain on freshly graded soil, however, washes away your grade and creates erosion channels before roots anchor the sod. If heavy rain is forecast, delay installation by 24 to 48 hours.
Why is my sod turning yellow after installation?
Yellowing across the entire area usually points to nitrogen deficiency, iron deficiency in alkaline soils, or over-watering causing waterlogged roots. Yellowing in patches with defined margins suggests fungal disease. Conduct a soil test and check your irrigation depth before reaching for any treatment.
Do I need to fertilize before laying sod?
Yes. A starter fertilizer high in phosphorus — such as a 10-20-10 formulation — should be raked into the top 2 to 3 cm of soil immediately before installation. Phosphorus drives root cell division and is the single most important nutrient during the first three weeks of establishment.
How soon can I mow after laying sod?
Mow for the first time only after the sod passes the tug test, meaning it resists being pulled up by hand. This typically occurs at 2 to 3 weeks. Let the grass grow 30 to 50% above its target maintenance height before the first cut, and never remove more than one-third of the blade length in a single session.
How do I fix sod that is dying at the seams?
Seam failure is almost always caused by air gaps, insufficient watering at the edges, or pieces that were not pressed firmly against the soil. Press the affected edges firmly down, work a fine soil topdressing into the gap, and increase irrigation frequency for 3 to 5 days. If the sod is fully dead at the seam, cut out the damaged strip and replace it with a fresh piece.
References:
1. Bughrara, S. (2004). Nine steps for establishing a new lawn using sod. Michigan State University Extension.
2. Braun, R. C., Ojeokun, O. C., Patton, A. J., Fry, J. D., Chandra, A., & Martin, C. (2025). Zoysiagrass sod production: A review. Crop, Forage & Turfgrass Management, 11(2), e70074.
3. Ojeokun, O. C. (2024). Zoysiagrass sod performance, rooting characteristics, and thatch accumulation among genotypes (Doctoral dissertation).
4. Ojeokun, O., & Fry, J. (2024). Impact of Sod Growers’ Grow-in Strategies on the Performance of Zoysiagrass Sod. Kansas Agricultural Experiment Station Research Reports, 10(4), 2.
5. Guertal, E. A., Han, D. Y., & Smith, C. (2002). Best management practices for Alabama sod production.
6. Barton, L. G. G. Y., Wan, G. G. Y., & Colmer, T. D. (2006). Turfgrass (Cynodon dactylon L.) sod production on sandy soils: II. Effects of irrigation and fertiliser regimes on N leaching. Plant and soil, 284(1), 147-164.
7. Duke, J. A. (2017). Handbook of phytochemical constituent grass, herbs and other economic plants: Herbal reference library. Routledge.
8. Askew, W. B., Godara, N., Brewer, J. R., Gonçalves, C. G., Goatley, M., & Askew, S. D. (2024). Impact of species selection on plant community, sod tensile strength, and translocation rooting of a pollinator‐garden sod. Agronomy Journal, 116(6), 2670-2677.
9. Segars, C. A., Moss, J. Q., Martin, D. L., & Wu, Y. (2022). Sod production characteristics: How strong is your bermudagrass?. International Turfgrass Society Research Journal, 14(1), 256-261.
10. van der Meijden, R. (2023). Updating the sod pulling methodology for assessing the erosion resistance of grassed dike covers: Literature report.